Mục tiêu bài hướng dẫn
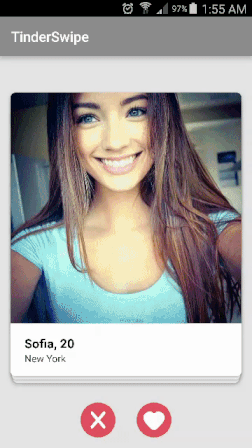
- Chúng ta sẽ tạo swipe view như được sử dụng trong Tinder. Vuốt sang phải được coi là chấp nhận và vuốt sang trái bị từ chối.
- Như chúng ta có thể thấy trong ảnh gif ở trên, có rất nhiều thứ xảy
ra. Tất cả những thứ này được triển khai trong lớp SwipePlaceHolderView
của thư viện PlaceHolderView.
- Chúng ta sẽ load ảnh từ các url và và cho ảnh hiển thị lên. Để làm đượcđiều này, chúng ta sẽ sử dụng thư viện Glide.
- Dữ liệu sẽ được lấy ra từ tệp json, tệp json này sẽ được lưu trữ trong thư mục asset.
- Sử dụng thư viện Gson để parse json.
Bước 1
Tạo project mới như thông thường
Cấu hình file build.gradle như sau:
android {
    ...
    sourceSets {
        main {
            assets.srcDirs = ['src/main/assets', 'src/main/assets/']
            res.srcDirs = ['src/main/res', 'src/main/res/drawable']
        }
    }
}

dependencies {
    ...
    compile 'com.mindorks:placeholderview:0.7.1'
    compile 'com.android.support:cardview-v7:25.3.1'
    compile 'com.github.bumptech.glide:glide:3.7.0'
    compile 'com.google.code.gson:gson:2.7'
}
Lưu ý:
- Thêm folder asset để chứa file json.
- Sử dụng cardview để hiển thị ảnh.
- Thêm internet permission vào file AndroidManifest.xml
<uses-permission android:name="android.permission.INTERNET"/>
Bước 2
Tạo file giao diện màn hình chính activity_main.xml
<?xml version="1.0" encoding="utf-8"?>
<FrameLayout
    xmlns:android="http://schemas.android.com/apk/res/android"
    android:orientation="vertical"
    android:layout_width="match_parent"
    android:layout_height="match_parent"
    android:background="@color/grey">
    <LinearLayout
        android:layout_width="match_parent"
        android:layout_height="80dp"
        android:layout_gravity="bottom"
        android:gravity="center"
        android:orientation="horizontal">
        <ImageButton
            android:id="@+id/rejectBtn"
            android:layout_width="50dp"
            android:layout_height="50dp"
            android:background="@drawable/ic_cancel"/>
        <ImageButton
            android:id="@+id/acceptBtn"
            android:layout_width="50dp"
            android:layout_height="50dp"
            android:layout_marginLeft="30dp"
            android:background="@drawable/ic_heart"/>
    </LinearLayout>
    <com.mindorks.placeholderview.SwipePlaceHolderView
        android:id="@+id/swipeView"
        android:layout_width="match_parent"
        android:layout_height="match_parent"/>
</FrameLayout>
Bước 3
Tạo file tinder_card_view.xml
<?xml version="1.0" encoding="utf-8"?>
<FrameLayout
    xmlns:android="http://schemas.android.com/apk/res/android"
    xmlns:app="http://schemas.android.com/apk/res-auto"
    android:layout_width="350dp"
    android:layout_height="425dp"
    android:layout_marginBottom="50dp"
    android:orientation="vertical">
    <android.support.v7.widget.CardView
        android:orientation="vertical"
        android:background="@color/white"
        android:layout_width="match_parent"
        android:layout_height="match_parent"
        android:layout_margin="10dp"
        app:cardCornerRadius="7dp"
        app:cardElevation="4dp">
        <ImageView
            android:id="@+id/profileImageView"
            android:scaleType="centerCrop"
            android:layout_width="match_parent"
            android:layout_height="match_parent"
            android:layout_marginBottom="75dp"/>
        <LinearLayout
            android:layout_width="match_parent"
            android:layout_height="75dp"
            android:orientation="vertical"
            android:layout_gravity="bottom"
            android:gravity="center|left"
            android:paddingLeft="20dp">
            <TextView
                android:id="@+id/nameAgeTxt"
                android:layout_width="wrap_content"
                android:textColor="@color/colorPrimaryDark"
                android:textSize="18dp"
                android:textStyle="bold"
                android:layout_height="wrap_content"/>
            <TextView
                android:id="@+id/locationNameTxt"
                android:layout_width="wrap_content"
                android:layout_height="wrap_content"
                android:textColor="@color/colorPrimaryDark"
                android:textSize="14dp"
                android:textStyle="normal"/>
        </LinearLayout>
    </android.support.v7.widget.CardView>
</FrameLayout>
Bước 4
Tạo file tinder_swipe_in_msg_view.xml
<?xml version="1.0" encoding="utf-8"?>
<LinearLayout
    xmlns:android="http://schemas.android.com/apk/res/android"
    android:orientation="vertical"
    android:layout_width="350dp"
    android:layout_height="425dp">
    <TextView
        android:layout_width="wrap_content"
        android:layout_height="wrap_content"
        android:textSize="32sp"
        android:textStyle="bold"
        android:layout_margin="40dp"
        android:textColor="@android:color/holo_green_light"
        android:text="Accept"/>
</LinearLayout>
Bước 5
Tạo file tinder_swipe_out_msg_view.xml
<?xml version="1.0" encoding="utf-8"?>
<LinearLayout
    xmlns:android="http://schemas.android.com/apk/res/android"
    android:orientation="vertical"
    android:layout_width="350dp"
    android:gravity="right"
    android:layout_height="425dp">
    <TextView
        android:layout_width="wrap_content"
        android:layout_height="wrap_content"
        android:textSize="32sp"
        android:textStyle="bold"
        android:layout_margin="40dp"
        android:textColor="@android:color/holo_red_light"
        android:text="Reject"/>
</LinearLayout>
Bước 6
File json có nội dung như sau:
[
   {
      "url":"https://pbs.twimg.com/profile_images/572905100960485376/GK09QnNG.jpeg",
      "name":"Sofia",
      "age":20,
      "location":"New York"
   },
   {
      "url":"http://cdn.cavemancircus.com//wp-content/uploads/images/2015/june/pretty_girls_3/pretty_girls_15.jpg",
      "name":"Roma",
      "age":22,
      "location":"California"
   },
   {
      "url":"http://i.imgur.com/N6SaAlZ.jpg",
      "name":"Zoya",
      "age":23,
      "location":"Atlantic City"
   },
   {
      "url":"http://cdn.cavemancircus.com//wp-content/uploads/images/2015/january/pretty_girls_2/pretty_girls_5.jpg",
      "name":"Carol",
      "age":19,
      "location":"New City"
   },
   {
      "url":"http://www.qqxxzx.com/images/pretty-girls-pictures/pretty-girls-pictures-17.jpg",
      "name":"Saansa",
      "age":20,
      "location":"Manhattan"
   },
   {
      "url":"http://www.qqxxzx.com/images/pretty-girls-pictures/pretty-girls-pictures-18.jpg",
      "name":"Khaleesi",
      "age":24,
      "location":"Future Westros"
   },
   {
      "url":"http://oddpad.com/wp-content/uploads/2015/05/pretty_girls_51.jpg",
      "name":"Heena",
      "age":21,
      "location":"India"
   },
   {
      "url":"http://oddpad.com/wp-content/uploads/2014/12/pretty_girls_13.jpg",
      "name":"Jasmin",
      "age":23,
      "location":"Taxes"
   },
   {
      "url":"http://www.spyderonlines.com/images/wallpapers/pretty-girls-pictures/pretty-girls-pictures-16.jpg",
      "name":"Monica",
      "age":23,
      "location":"New York"
   },
   {
      "url":"http://cdn.cavemancircus.com//wp-content/uploads/images/2015/june/pretty_girls_3/pretty_girls_20.jpg",
      "name":"Phoebe",
      "age":22,
      "location":"New York City"
   },
   {
      "url":"http://cdn.cavemancircus.com//wp-content/uploads/images/2015/march/pretty_girls_2/pretty_girls_12.jpg",
      "name":"Rachel",
      "age":22,
      "location":"Central Perk"
   },
   {
      "url":"https://s-media-cache-ak0.pinimg.com/736x/de/87/7b/de877bcccc2295a58fe8758fee0ebc7d.jpg",
      "name":"Jainis",
      "age":24,
      "location":"New York"
   },
   {
      "url":"https://scontent.cdninstagram.com/hphotos-xpf1/t51.2885-15/e15/10986280_404995676329336_1177563605_n.jpg",
      "name":"Samia",
      "age":19,
      "location":"India"
   },
   {
      "url":"http://scontent-a.cdninstagram.com/hphotos-xaf1/t51.2885-15/10624158_694652173966291_65999198_n.jpg",
      "name":"Hornol",
      "age":24,
      "location":"Caltech"
   },
   {
      "url":"http://i.imgur.com/wqsvWT4.jpg",
      "name":"Korial",
      "age":21,
      "location":"Japan"
   },
   {
      "url":"http://data.whicdn.com/images/60103426/large.jpg",
      "name":"Chin Si",
      "age":23,
      "location":"China"
   },
   {
      "url":"http://oddpad.com/wp-content/uploads/2015/03/pretty_girls_31.jpg",
      "name":"SDF",
      "age":21,
      "location":"America"
   }
]
Bước 7
Tạo file Utils.java
public class Utils {

    private static final String TAG = "Utils";

    public static List<Profile> loadProfiles(Context context){
        try{
            GsonBuilder builder = new GsonBuilder();
            Gson gson = builder.create();
            JSONArray array = new JSONArray(loadJSONFromAsset(context, "profiles.json"));
            List<Profile> profileList = new ArrayList<>();
            for(int i=0;i<array.length();i++){
                Profile profile = gson.fromJson(array.getString(i), Profile.class);
                profileList.add(profile);
            }
            return profileList;
        }catch (Exception e){
            e.printStackTrace();
            return null;
        }
    }

    private static String loadJSONFromAsset(Context context, String jsonFileName) {
        String json = null;
        InputStream is=null;
        try {
            AssetManager manager = context.getAssets();
            Log.d(TAG,"path "+jsonFileName);
            is = manager.open(jsonFileName);
            int size = is.available();
            byte[] buffer = new byte[size];
            is.read(buffer);
            is.close();
            json = new String(buffer, "UTF-8");
        } catch (IOException ex) {
            ex.printStackTrace();
            return null;
        }
        return json;
    }
}
Lưu ý
File này dùng để xử lý dữ liệu json và đổ vào model
Bước 8
Tạo đối tượng Profile
public class Profile {

    @SerializedName("name")
    @Expose
    private String name;

    @SerializedName("url")
    @Expose
    private String imageUrl;

    @SerializedName("age")
    @Expose
    private Integer age;

    @SerializedName("location")
    @Expose
    private String location;

    public String getName() {
        return name;
    }

    public void setName(String name) {
        this.name = name;
    }

    public String getImageUrl() {
        return imageUrl;
    }

    public void setImageUrl(String imageUrl) {
        this.imageUrl = imageUrl;
    }

    public Integer getAge() {
        return age;
    }

    public void setAge(Integer age) {
        this.age = age;
    }

    public String getLocation() {
        return location;
    }

    public void setLocation(String location) {
        this.location = location;
    }
}
Lưu ý
- Chú thích @SerializedName thuộc về lớp Gson và được sử dụng để đọc biến tệp json và liên kết nó với Model
- Chú thích @Exposed chỉ ra rằng trường này nên được định nghĩa với JSON serialization hoặc deserialization.
Bước 9
Bây giờ chúng ta sẽ tạo một class để bind cardview và các phương thức của nó trong layout.
Tạo fileTinderCard.java
@Layout(R.layout.tinder_card_view)
public class TinderCard {

    @View(R.id.profileImageView)
    private ImageView profileImageView;

    @View(R.id.nameAgeTxt)
    private TextView nameAgeTxt;

    @View(R.id.locationNameTxt)
    private TextView locationNameTxt;

    private Profile mProfile;
    private Context mContext;
    private SwipePlaceHolderView mSwipeView;

    public TinderCard(Context context, Profile profile, SwipePlaceHolderView swipeView) {
        mContext = context;
        mProfile = profile;
        mSwipeView = swipeView;
    }

    @Resolve
    private void onResolved(){
        Glide.with(mContext).load(mProfile.getImageUrl()).into(profileImageView);
        nameAgeTxt.setText(mProfile.getName() + ", " + mProfile.getAge());
        locationNameTxt.setText(mProfile.getLocation());
    }

    @SwipeOut
    private void onSwipedOut(){
        Log.d("EVENT", "onSwipedOut");
        mSwipeView.addView(this);
    }

    @SwipeCancelState
    private void onSwipeCancelState(){
        Log.d("EVENT", "onSwipeCancelState");
    }

    @SwipeIn
    private void onSwipeIn(){
        Log.d("EVENT", "onSwipedIn");
    }

    @SwipeInState
    private void onSwipeInState(){
        Log.d("EVENT", "onSwipeInState");
    }

    @SwipeOutState
    private void onSwipeOutState(){
        Log.d("EVENT", "onSwipeOutState");
    }
}
Lưu ý
- @layout được sử dụng để bind layout với lớp này.
- @View được sử dụng để bind các view trong layout mà chúng ta muốn tham chiếu.
- @Resolve
để bind một phương thức sẽ được thực thi khi view đã sẵn sàng được sử
dụng. Bất kỳ thao tác nào chúng ta muốn thực hiện trên các view tham
chiếu nên được viết bằng một method và chú thích với điều này.
- @SwipeOut gọi phương thức khi cardview bị từ chối.
- @SwipeIn gọi phương thức khi cardviewdđược đồng ý.
- @SwipeCancelStated gọi phương thức chú thích khi thẻ được đặt lại chỗ cũ.
- @SwipeInState gọi phương thức chú thích cho đến khi thẻ di chuyển đến trạng thái được chấp nhận.
- @SwipeOutState gọi phương thức chú thích cho đến khi thẻ di chuyển đến trạng thái bị từ chối.
- Quan trọng: Nếu chúng ta không có kế hoạch để thêm lại một view thì class nên được chú thích bằng @NonReables
để các tham chiếu được giải phóng và bộ nhớ được tối ưu hóa. Chúng ta
sẽ thêm một view nếu bị từ chối, vì vậy chúng tôi đã không sử dụng @NonReUs.
Bước 10
Cuối cùng tạo file MainActivity.java để xử lý code.
public class MainActivity extends AppCompatActivity {

    private SwipePlaceHolderView mSwipeView;
    private Context mContext;

    @Override
    protected void onCreate(Bundle savedInstanceState) {
        super.onCreate(savedInstanceState);
        setContentView(R.layout.activity_main);

        mSwipeView = (SwipePlaceHolderView)findViewById(R.id.swipeView);
        mContext = getApplicationContext();

        mSwipeView.getBuilder()
                .setDisplayViewCount(3)
                .setSwipeDecor(new SwipeDecor()
                        .setPaddingTop(20)
                        .setRelativeScale(0.01f)
                        .setSwipeInMsgLayoutId(R.layout.tinder_swipe_in_msg_view)
                        .setSwipeOutMsgLayoutId(R.layout.tinder_swipe_out_msg_view));


        for(Profile profile : Utils.loadProfiles(this.getApplicationContext())){
            mSwipeView.addView(new TinderCard(mContext, profile, mSwipeView));
        }

        findViewById(R.id.rejectBtn).setOnClickListener(new View.OnClickListener() {
            @Override
            public void onClick(View v) {
                mSwipeView.doSwipe(false);
            }
        });

        findViewById(R.id.acceptBtn).setOnClickListener(new View.OnClickListener() {
            @Override
            public void onClick(View v) {
                mSwipeView.doSwipe(true);
            }
        });
    }
}
Lưu ý
- Chúng ta có được ví dụ của SwipePlaceHolderView.
- Sau đó, chúng ta sử dụng phương thức getBuilder () để sửa đổi cấu
hình view mặc định. Trong ví dụ này, chúng ta sẽ thêm 3 thẻ vào màn hình
và tiếp tục thêm thẻ tiếp theo khi thẻ trên cùng bị xóa.
- Lớp SwipeDecor được sử dụng để điều chỉnh các yếu tố trực quan của
view. Ở đây paddingTop và RelScale đưa ra nhận thức về một thẻ được đặt
trong ngăn xếp. Thông báo cho thẻ đã nêu được thêm thông qua
setSwipeInMsgLayoutId () và setSwipeOutMsgLayoutId ().
- Chúng ta load dữ liệu json và phân tích cú pháp vào Object và thêm
nó vào danh sách SwipePlaceHolderView bằng phương thức addView ().
- Để lập trình thực hiện thao tác vuốt, chúng ta gọi phương thức
doSwipe () với cờ để biểu thị thao tác vuốt được chấp nhận hoặc bị từ
chối.
Nguồn tham khảo:
https://blog.mindorks.com/android-tinder-swipe-view-example-3eca9b0d4794
Source code:
https://github.com/janishar/Tutorials/tree/master/TinderSwipe
Comments
Post a Comment